

Hello, youve stumbled into the old Cogblog archives
We've switched our blogging focus to our new Innerworks content, where tech community members can share inspiring stories, content, and top tips. Because of this, old Cogworks blogs will soon be deleted from the site, so enjoy it while you can. A few of these might refer to images in the text, but those have been deleted already sorry. Some of these subjects will return, some aren't relevant anymore, and some just don't fit the unbiased community initiative of Innerworks.
If you'd like to take on this subject yourself please submit a new blog!
Farewell Cogworks Blog 💚
In this quick-fire tutorial, I will present how to integrate Cypress tests with the Continuous Delivery (CD) solution Netlify!
Why integrate Netlify with Cypress?
Netlify builds your site using a Git repository, which means that every time you push changes, they are automatically deployed and a new version of your site is published. Integrating Netlify and Cypress can be especially helpful if you need to run tests before deployments to ensure everything works as expected.
Just follow these three simple steps to get started:
1. Add cypress to your project.
First of all, add Cypress to your project (if you’re using Npm, you can install Cypress as a dependency):
npm i -D cypress
+ cypress@6.5.0
To start your Cypress configuration, create a cypress.json file and write a simple test to see how it works. Your test page can be served locally with npm run dev and be accessible:
cypress.json
{
"baseUrl": "http://localhost:8080",
"fixturesFolder": false,
"supportFile": false,
"pluginsFile": false,
"screenshotOnRunFailure": false,
"video": false
}
Now, create a very simple test for our demo purposes in Cypress/integration.
demo.spec.js
describe('Demo site', () => {
it('loads', () => {
cy.visit('/test.html')
Cy.contains('p', "I'm paragraph you are looking for...").should('be. visible')
})
})
Next, run the test locally.
2. Add the Netlify Cypress plugin.
To run tests for Netlify builds, install the Netlify-cypress-plugin as a dependency.
npm install --save-dev netlify-plugin-cypress
+ netlify-plugin-cypress@1.11.1
3. Configure Netlify to run Cypress tests after a build.
Now, it’s time to set your configuration options for Netlify so you can use the netlify-plugin-cypress post-build. To do this, you need to create a netlify.toml file.
# Netlify config file
# https://docs.netlify.com/configure-builds/file-based-configuration/
[build. environment]
# Cache Cypress binary in the local "node_modules" folder
# So Netlify caches it
CYPRESS_CACHE_FOLDER = "./node_modules/CypressBinary"
# set TERM variable for terminal output
TERM = "xterm"
[[plugins]]
package = "netlify-plugin-cypress"
To enable the use of a cache between builds, create a CYPRESS_CACHE_FOLDER and place the Cypress binary inside the node_modules folder.
After you’ve committed your changes to the repository, a build task will be triggered on Netlify (you can also check information about Cypress test results in the deploy log).
Oh, and in the deploy summary!
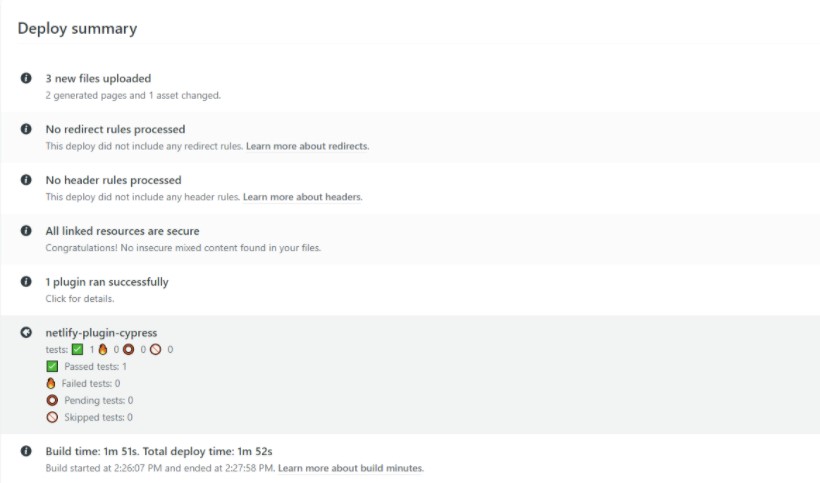
What if any tests fail?
Don't worry; if any test fails, a new version of a site won't be published. After checking information about which test failed in the deploy summary or deploy log, just head back to your code and fix errors so you can ensure your work is at its best.
That’s it - I hope you find this quick guide useful :)

Innerworks and Cogworks are proud to partner with Community TechAid who aim to enable sustainable access to technology and skills needed to ensure digital inclusion for all. Any support you can give is hugely appreciated.