
Developer Grzegorz whizzes through a quick way to integrate Netlify with Cypress so you can power-up modern automation testing in your projects.
Innerworks is coming soon...
This blog was originally published on our previous Cogworks blog page. The Cogworks Blog is in the process of evolving into Innerworks, our new community-driven tech blog. With Innerworks, we aim to provide a space for collaboration, knowledge-sharing, and connection within the wider tech community. Watch this space for Innerworks updates, but don't worry - you'll still be able to access content from the original Cogworks Blog if you want.
In this quick-fire tutorial, I will present how to integrate Cypress tests with the Continuous Delivery (CD) solution Netlify!
Why integrate Netlify with Cypress?
Netlify builds your site using a Git repository, which means that every time you push changes, they are automatically deployed and a new version of your site is published. Integrating Netlify and Cypress can be especially helpful if you need to run tests before deployments to ensure everything works as expected.
Just follow these three simple steps to get started:
1. Add cypress to your project.
First of all, add Cypress to your project (if you’re using Npm, you can install Cypress as a dependency):
npm i -D cypress+ [email protected]
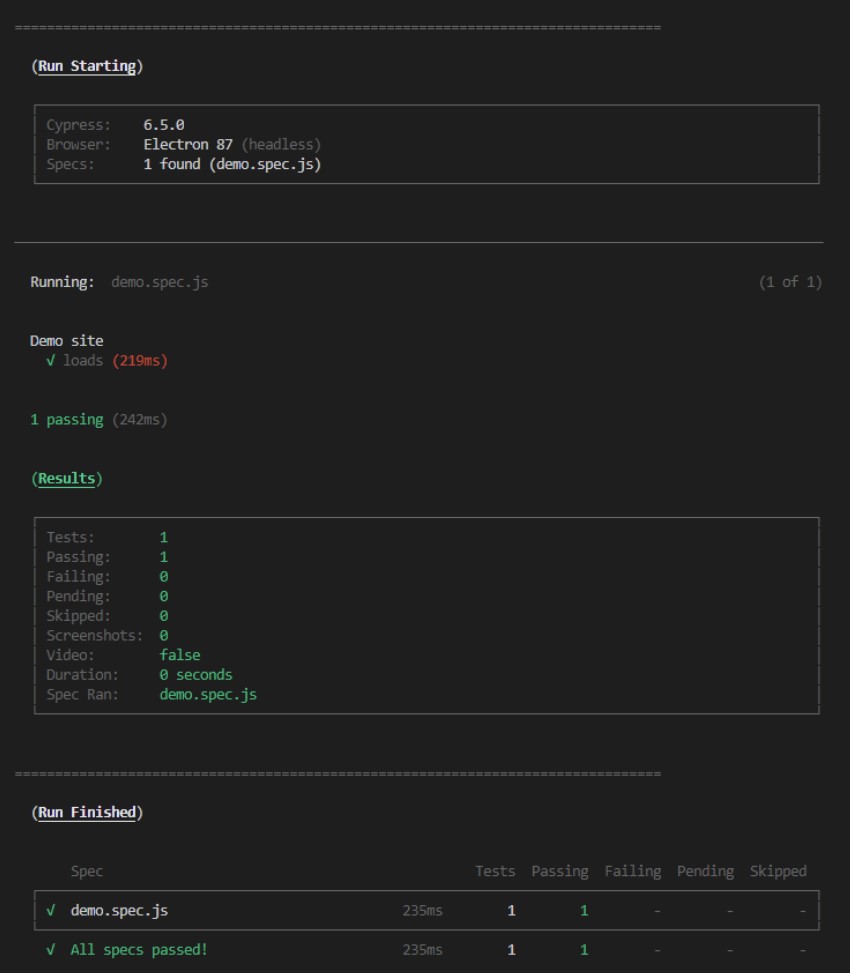
To start your Cypress configuration, create a cypress.json file and write a simple test to see how it works. Your test page can be served locally with npm run dev and be accessible on http://localhost:8080
cypress.json{"baseUrl": "http://localhost:8080","fixturesFolder": false,"supportFile": false,"pluginsFile": false,"screenshotOnRunFailure": false,"video": false}
Now create a very simple test for our demo purposes in Cypress/integration.
demo.spec.jsdescribe('Demo site', () => {it('loads', () => {cy.visit('/test.html')cy.contains('p', "I'm paragraph you are looking for...").should('be.visible')})})
Next, run the test locally.
2. Add the Netlify Cypress plugin.
To run tests for Netlify builds, install netlify-cypress-plugin as a dependency.
npm install --save-dev netlify-plugin-cypress+ [email protected]
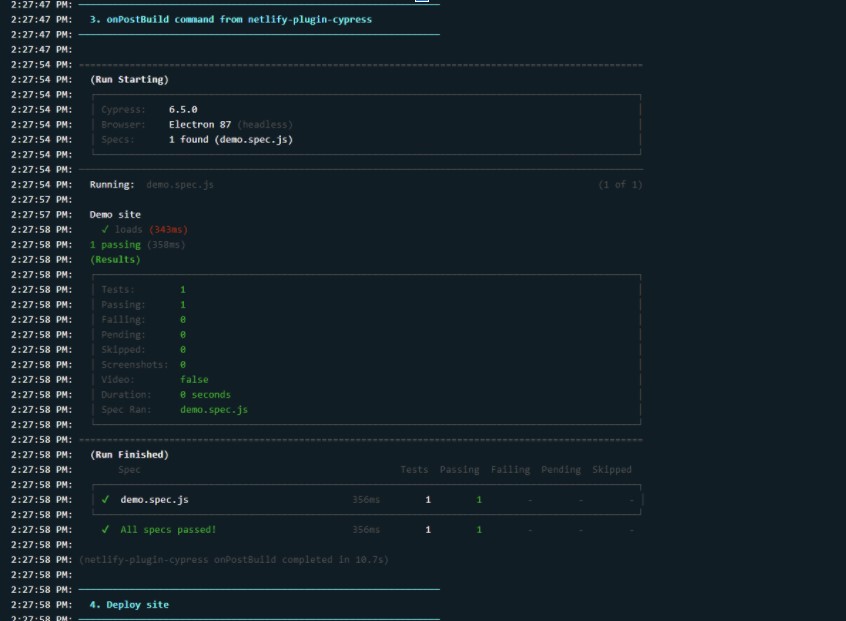
3. Configure Netlify to run Cypress tests after a build.
Now, it’s time to set your configuration options for Netlify so you can use the netlify-plugin-cypress post-build. To do this, you need to create a netlify.toml file.
# Netlify config file# https://docs.netlify.com/configure-builds/file-based-configuration/[build.environment]# cache Cypress binary in local "node_modules" folder# so Netlify caches itCYPRESS_CACHE_FOLDER = "./node_modules/CypressBinary"# set TERM variable for terminal outputTERM = "xterm"[[plugins]]package = "netlify-plugin-cypress"
To enable using cache between builds, create a CYPRESS_CACHE_FOLDER and place the Cypress binary inside the node_modules folder.
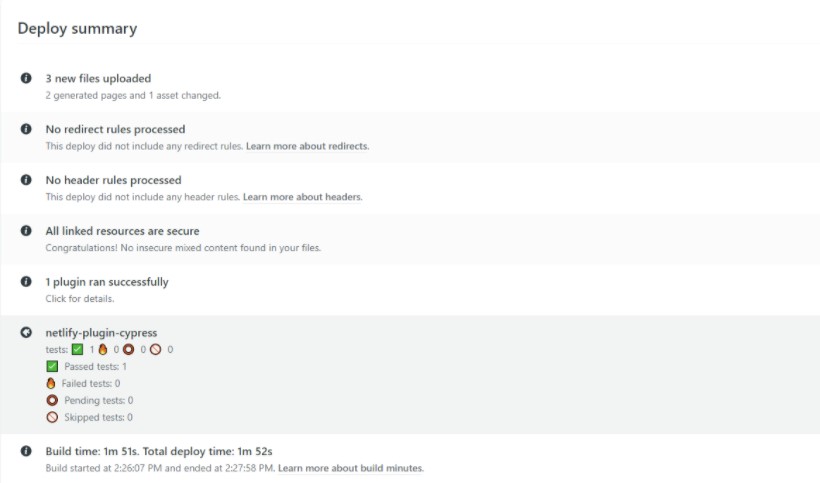
After you’ve committed your changes to the repository, a build task will be triggered on Netlify (you can also check information about Cypress test results in the deploy log).
Oh, and in the deploy summary!
What if any tests fail?
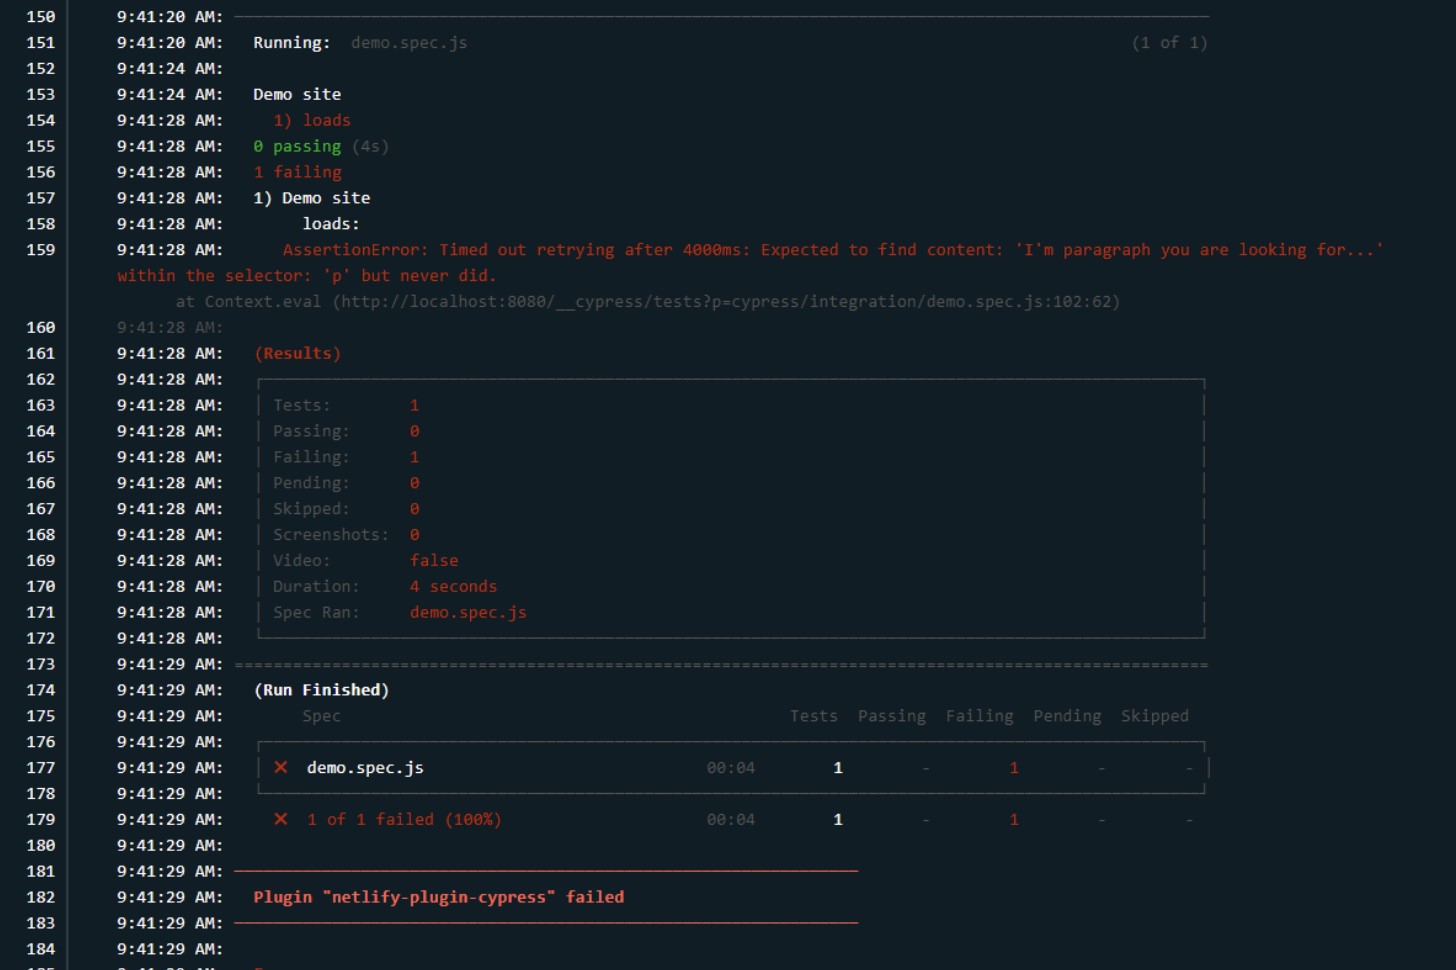
Don't worry, if any test fails, a new version of a site won't be published. After checking information about which test failed in the deploy summary or deploy log, just head back to your code and fix errors so you can ensure your work is at it's best.
That’s it - I hope you find this quick guide useful :)
For more tutorials, head over to our blog! When our team of developers are not estimating or in the middle of deployments, they are sharing insights from their time in the field! Check out Greg's handy guide on how to create a private NuGet feed in Azure DevOps (or if you're in a creative mood) Wojciech's tutorial on how to create a desktop app. with Electron and Vue!