
Here's how a digital spring clean changed our project workflow with just a few simple changes to Trello 💮
Innerworks is coming soon...
This blog was originally published on our previous Cogworks blog page. The Cogworks Blog is in the process of evolving into Innerworks, our new community-driven tech blog. With Innerworks, we aim to provide a space for collaboration, knowledge-sharing, and connection within the wider tech community. Watch this space for Innerworks updates, but don't worry - you'll still be able to access content from the original Cogworks Blog if you want.
It's natural to want to get organised. For any organisation or individual sporting a large amount of data, adopting a standard naming convention and generally "tidying up" can see your team start to reap the benefits.
Recently, we started with Trello (our trusted project management ally since 2013).
Our standard way of doing things worked fine, but there’s always room for discussion and improvement.
We’ll take you through our Trello cleanup process step-by-step.
So, what were our Trello board issues?
- There was inconsistency across board titles.
- We had over 100 old and inactive boards, making searching for a board a laborious scrolling task.
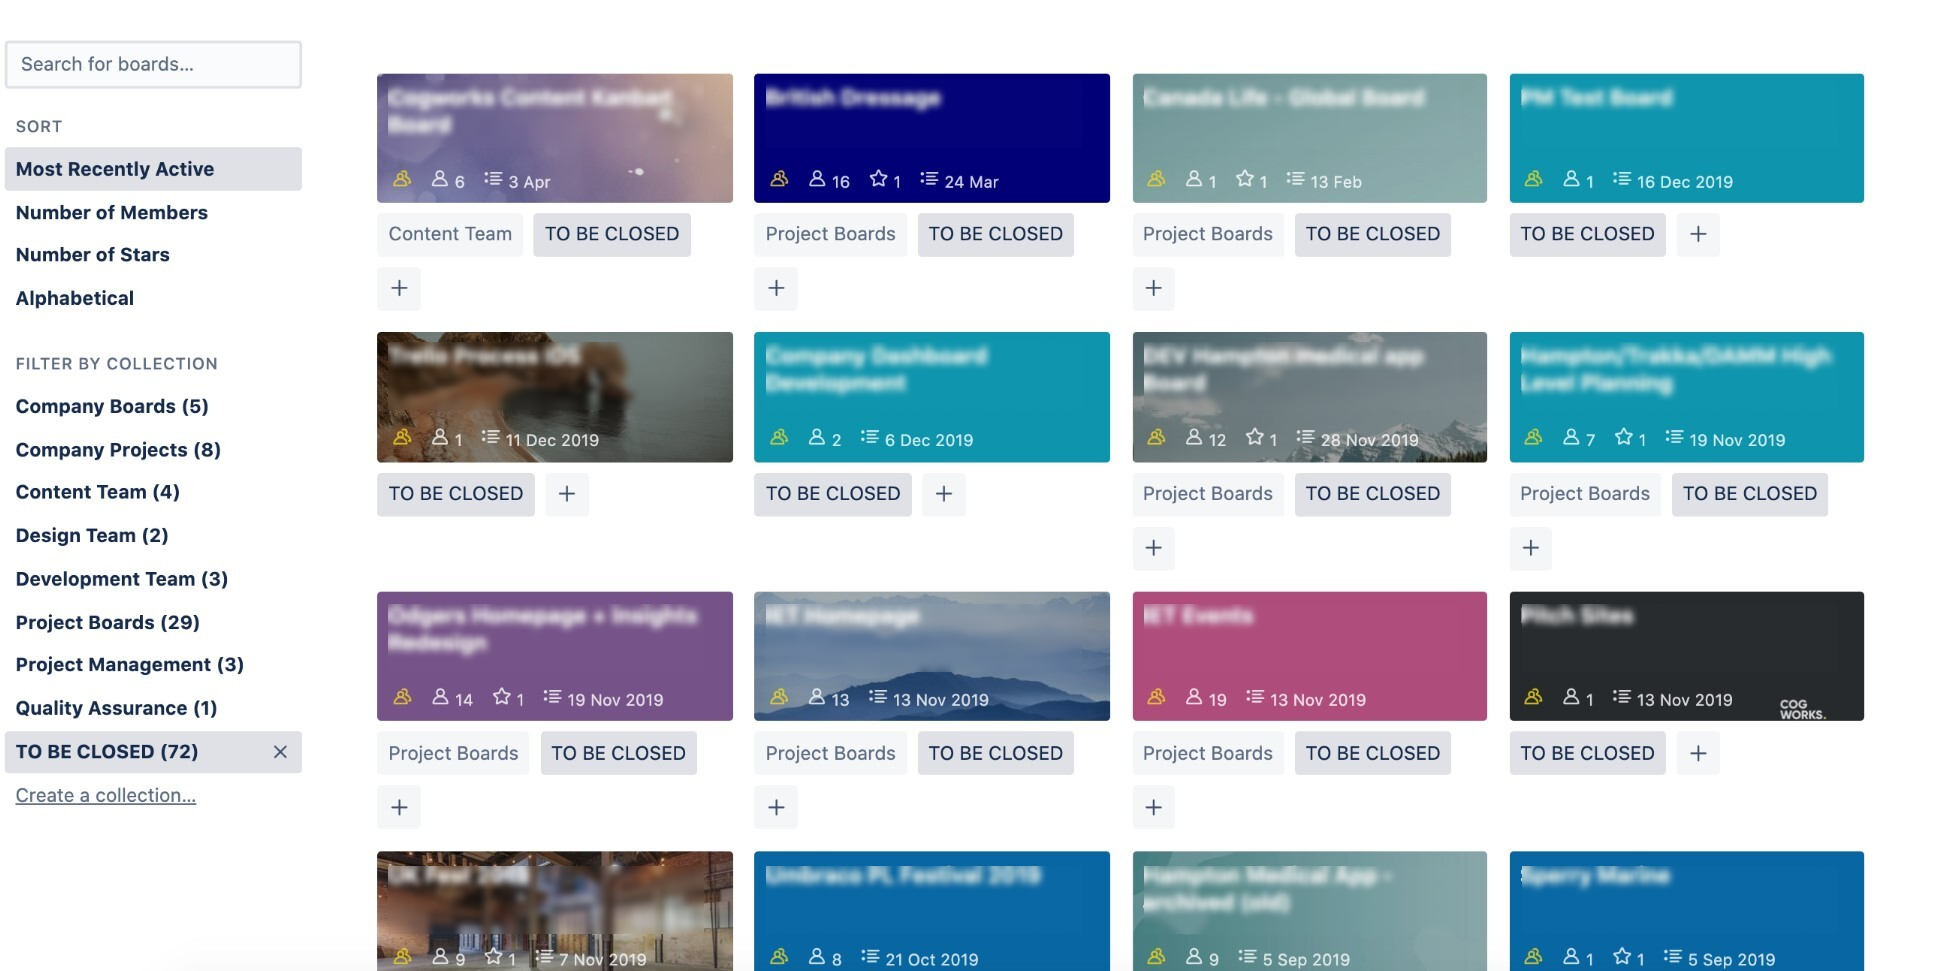
Although most of our client board content usually follows an intentional workflow based on the stages of each project, the purpose of this task was to make finding those boards easy for new starters or new project members. It was also in the name of a “good old cleanup” to improve productivity and eliminate distractions (below, you can see some of the inactive boards we were hoarding in all sorts of jazzy colours and title formats!).
Here are five simple steps to declutter Trello and a bit about what we did:
1. Put stuff in the bin.
Our team got to work naming any actively used boards with the prefix 'internal' before the original board title, allowing only a specific group of boards to stay in our collection before closing.
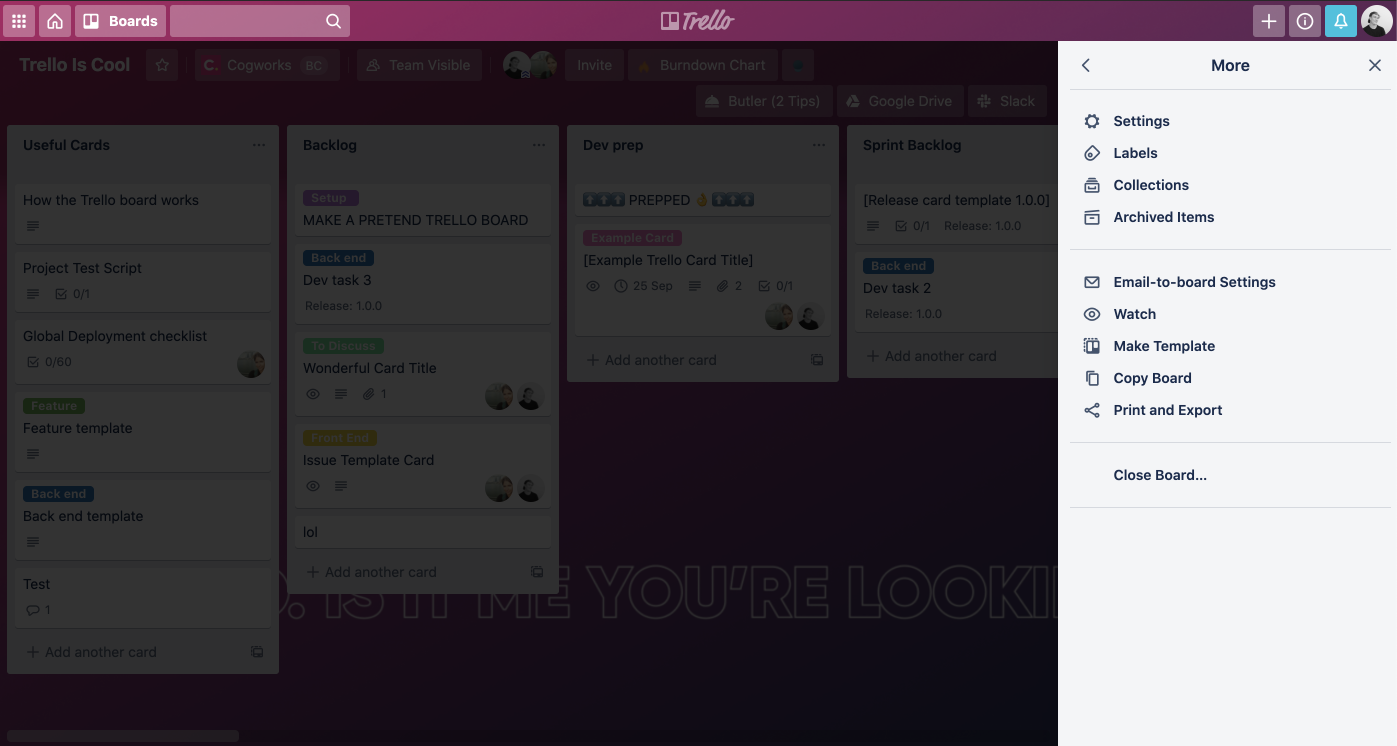
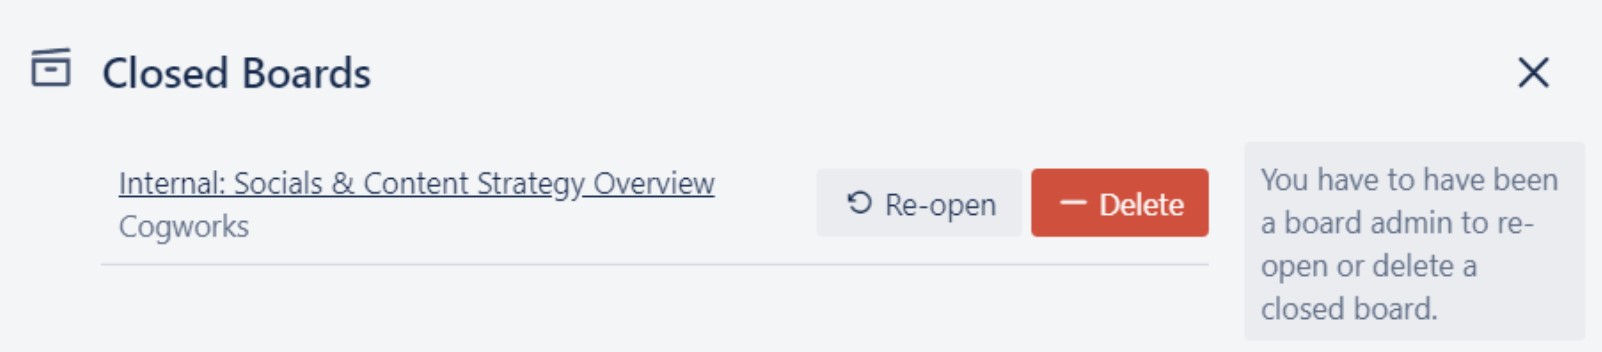
Once the boards had been closed (effectively archived for a later date) it was time to delete them permanently.
2. Come up with a Trello board naming convention.
Discussing the options with the team was important as these boards are part of our day-to-day at Cogworks.
Uppercase and lowercase were both considered, but to ensure client names could be legible from a glance, we applied a lowercase layout as this enables you to see more of the full title when searching for boards on Trello, like so:
Board type [Client Name - and project name].
Six categories made the final cut:
Retainer: [Client Name]
Planning: [Client Name - Project Name]
Production: [Client name - Project Name]
External: [Client name - Project Name]
Internal: [Area - project]
L10: [Department/team name]
With the aesthetics of the titles covered, we started to think about the purpose of each new type. These simple title changes prompted us to streamline and standardize our board process and the members within them, so it was essential to discuss and clarify the differences between each board type at this stage.
As with any application we use, relevance is important. Ensuring boards were only accessible to relevant team members was the next logical step to increase productivity and eliminate distractions. Larger projects spanning weeks and months were split into 'planning' and 'production' boards, so we now have two focused board categories where members are equally active from the beginning to the end of a particular project phase.
3. Use colours well.
With the six main categories of projects agreed upon and members rehomed, it made sense to make identifying the boards easier by applying coloured backgrounds. Boards are now easily identified by board title and the assigned colour.
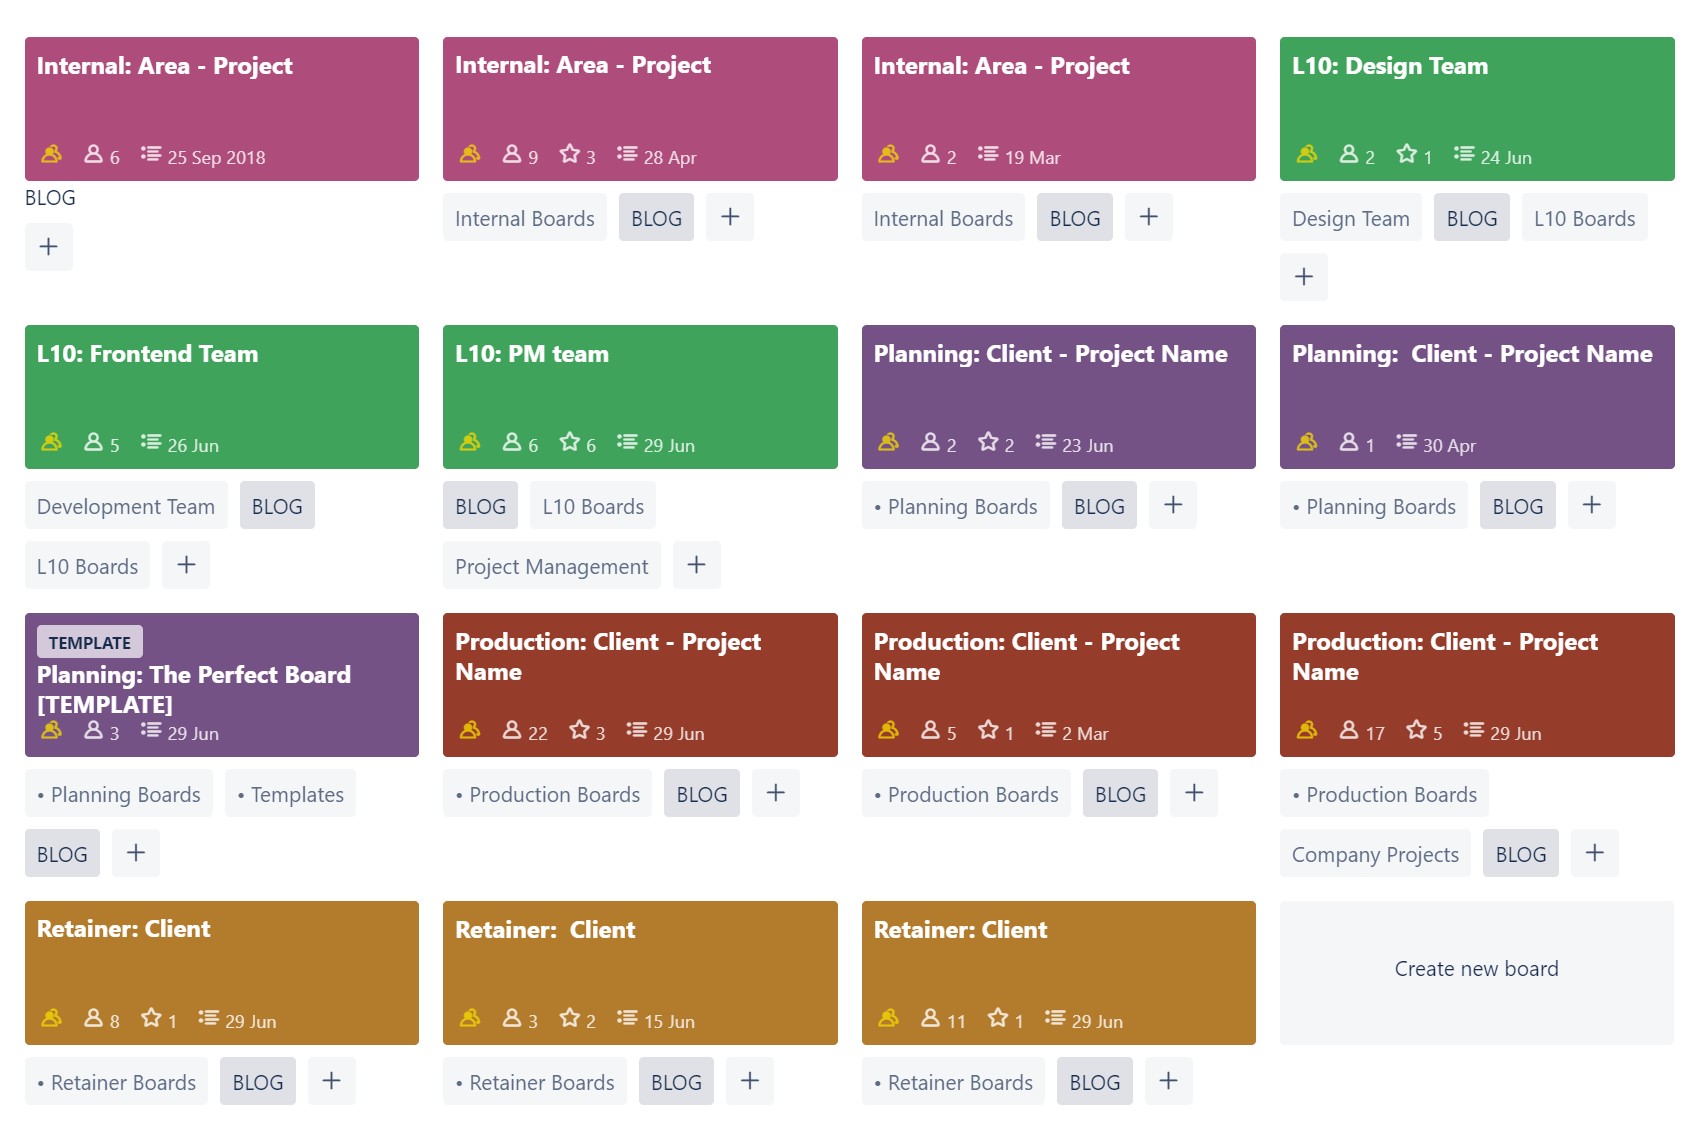
The imaginative example below shows that ‘CogClient1’ returns results for production, planning, retainer and external. Now we're used to the colours and title conventions - finding what we're looking for has never been easier.

4. Document the new rules.
As with any tidy-up, it's very difficult to stop once you start.
Instructions are a great idea for introducing new ideas. Changing the names, colours, columns, members and purposes of boards naturally prompted a process review and creation. In this case, Project Team Lead, Katie, put together some in-depth processes for the 'production' and 'planning' boards.
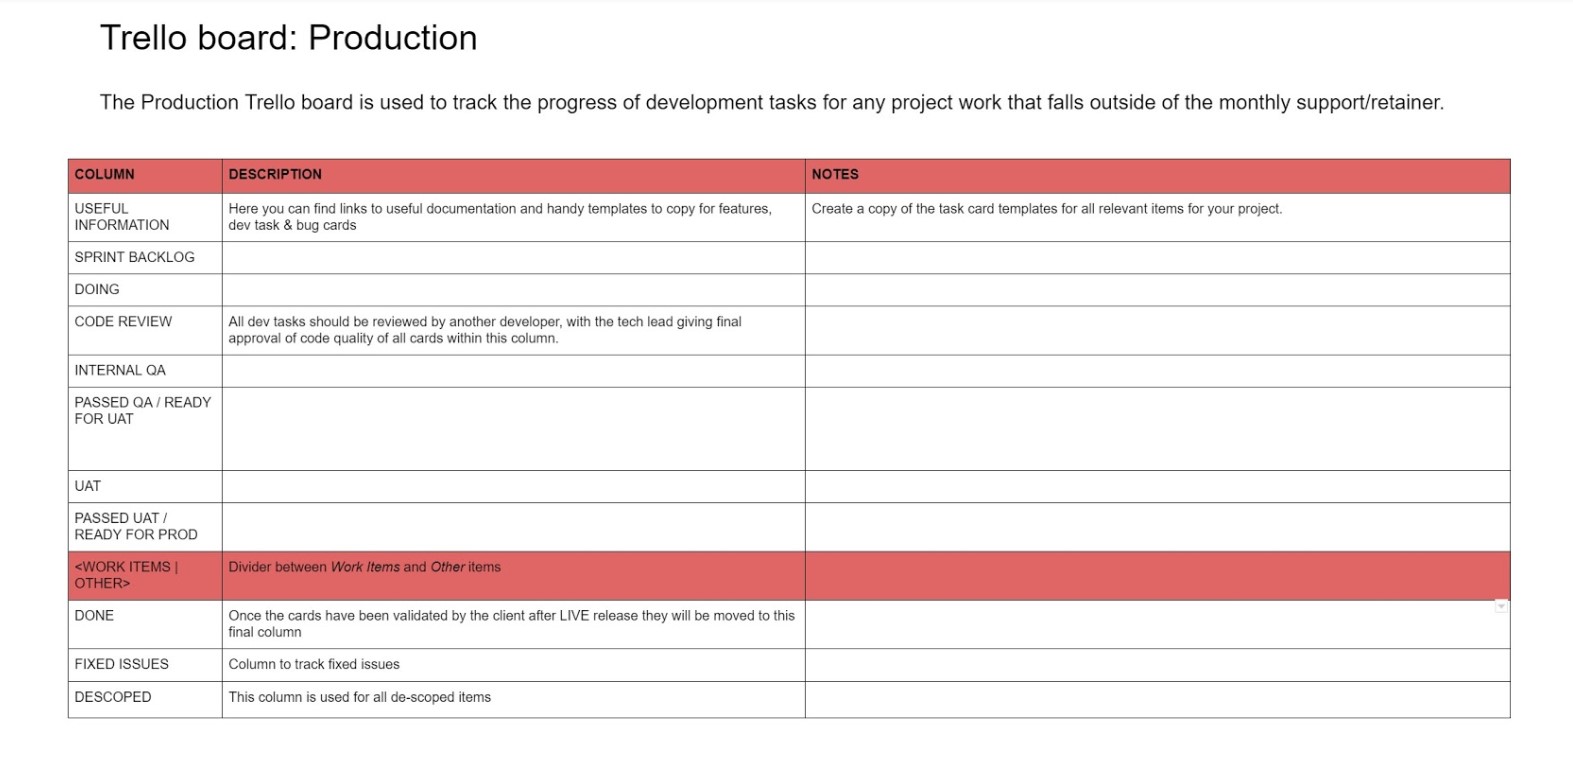
Let's look at a snippet of the example production board template Katie created simultaneously with the new naming conventions we mentioned in step two.
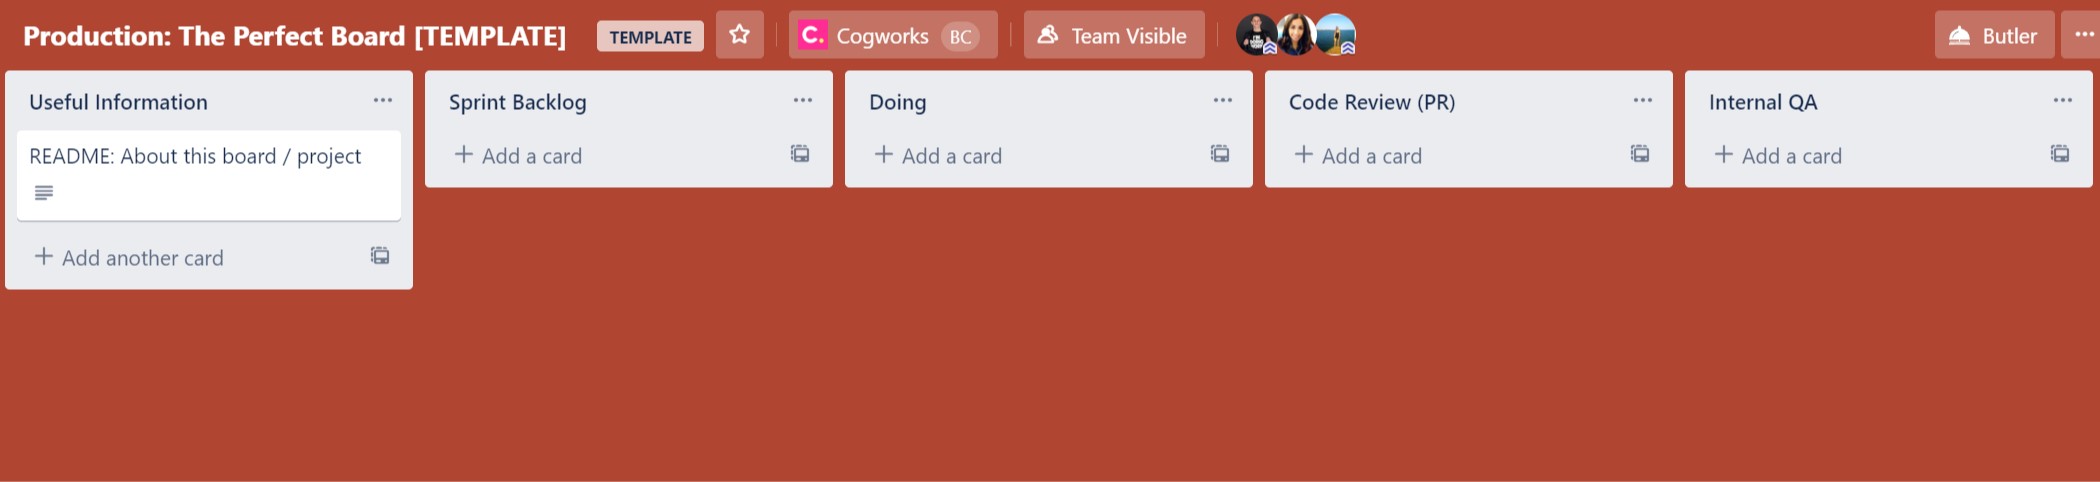
Looking at the board preview above, it's easy to see why a process like the one below will help all teams to navigate their cards through Trello boards in the best possible way to maximise efficiency on client projects.
5. Leave room for freedom.
Our project boards now mirror our recently modified internal Agile Cogworks project cycle process and help us to work smarter on our client projects.
Our internal boards, however, are arranged more freely. These still follow a standard naming convention, so they can be easily spotted, but we don’t necessarily need to adopt a blanket process as they tend to vary in structure and size. That said, creators of internal boards often include “rules of the board” which are instructions on how to populate best and move cards.
Freedom within our internal boards allows us to experiment with new functionalities from Trello to spark discussions about our ideas for continuous process improvement.

That's a wrap.
Regularly reviewing our processes means applying best practices to our favourite applications when needed. Trello's adaptability and ease of use let us make changes seamlessly (which is why you'll likely see it featured on our list of top tools!).
Could you identify areas for improvement within your Trello too?
- Declutter
- Trello
- Workflow
- Spring-clean
- process improvement
- application